系列文章
實戰使用Axure設計App,使用WebStorm開發(1) – 用Axure描述需求
實戰使用Axure設計App,使用WebStorm開發(2) – 創建 Ionic 項目
實戰使用Axure設計App,使用WebStorm開發(3) – 構建頁面架構
實戰使用Axure設計App,使用WebStorm開發(4) – 實現頁面UI
實戰使用Axure設計App,使用WebStorm開發(5) – 實現頁面功能
實戰使用Axure設計App,使用WebStorm開發(6) – 邁向后端
接上一篇系列文章,在本文中,將在WebStorm中繼續開發,實現頁面的功能。這需要一個頁面一個頁面的開發,來完成功能。本文將側重把所有頁面的UI都實現出來,先把前端的工作都完成了,然后再去鏈接后端的 RESTful Service。
登陸頁面
給頁面添加 login.html 添加頁面Html代碼。
<ion-view title="用戶登錄">
    <ion-content class="padding">
        <div class="login-title">
            <h2 class="energized">方便每一天</h2>
            <h2 class="assertive">配送系統</h2>
        </div>
        <div>
            <form novalidate="novalidate" on-valid-submit="doLogin()">
                <label class="item item-input validated">
                    <span class="input-label" for="account">賬號</span>
                    <input id="account" type="text" ng-model="user.name" placeholder="賬號" required="required" name="account" />
                    <i class="icon ion-alert-circled error"></i>
                </label>
                <label class="item item-input validated">
                    <span class="input-label" for="password">密碼</span>
                    <input id="password" type="password" ng-model="user.password" placeholder="********" required="required" name="password" />
                    <i class="icon ion-alert-circled error"></i>
                </label>
                <label class="item">
                    <button type="submit" class="button button-block button-positive icon ion-person icon-text">登錄</button>
                </label>
            </form>
        </div>
    </ion-content>
</ion-view>
為了實現,輸入框的驗證功能,需要給AngularJS加入兩個自定義的標簽: on-valid-submit, validated 由于這是一個全局的驗證功能就把它添加到app.js ddApp module下,如果只針對某個頁面,可以只添加到這個頁面的 controller 下。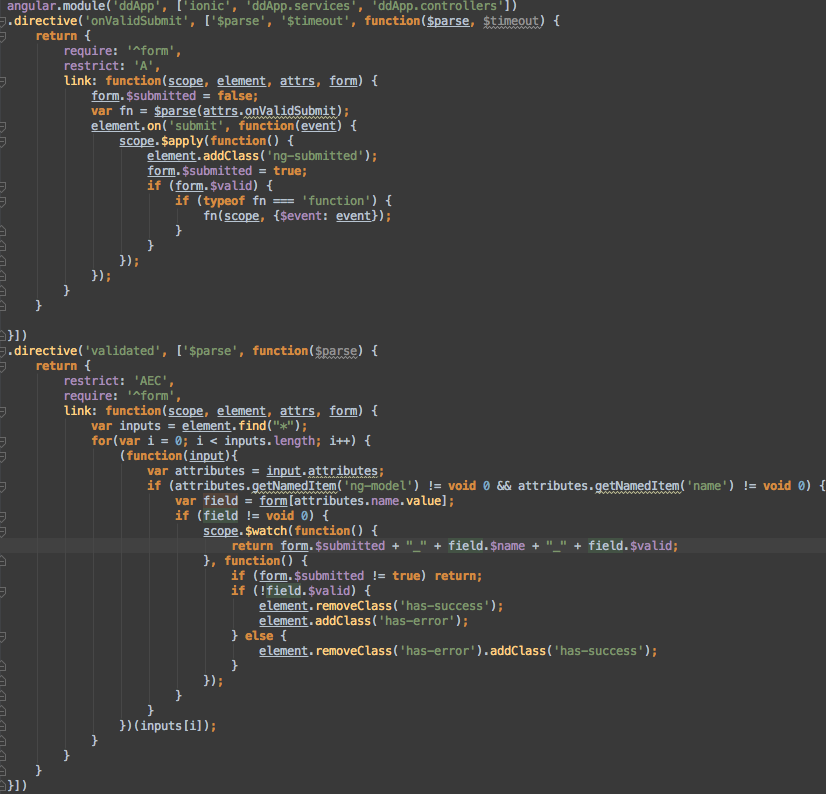
到這里登陸頁面的UI就完成了。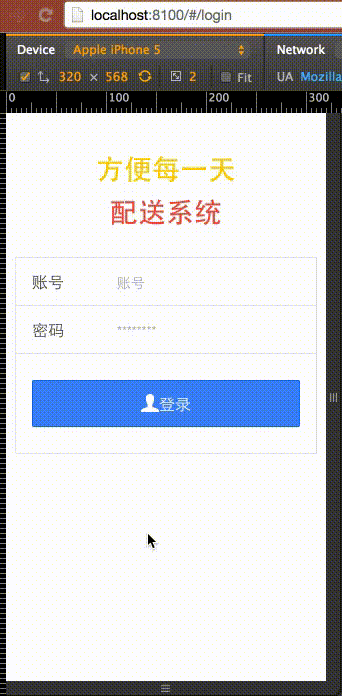
列表頁面
首先構建派送列表頁的Html內容:
<ion-view view-title="{{now | date:yyyy年M月d日}}">
    <ion-nav-bar class="bar bar-balanced" align-title="center">
        <ion-nav-buttons side="left">
            <li class="button icon icon-left ion-chevron-left" ng-click="doLogout()">退出</li>
        </ion-nav-buttons>
    </ion-nav-bar>
    <ion-content class="list order-list">
        <ion-item  class="item order-item" ng-repeat="order in orders">
            <img class="order-img" ng-src="{{order.qrSrc}}" ng-click="goDetail(order.id)" />
            <div class="order-text">
                <h2 ng-click="goDetail(order.id)">{{order.code}}</h2>
                <h3>{{order.pickTime}}</h3>
            </div>
            <div class="order-check" ng-click="goDetail(order.id)">
                <a class="button icon-right ion-chevron-right button-clear button-assertive"></a>
            </div>
        </ion-item >
    </ion-content>
    <div class="bar bar-footer bar-positive">
        <div class="button-bar">
            <li class="button icon ion-ios-keypad icon-text" ng-click="goManual()">手動輸入</li>
            <li class="button icon ion-qr-scanner icon-text" ng-click="goScan()">掃描二維碼</li>
        </div>
    </div>
</ion-view>
為了展示數據,這里在Service里做了一個MockDB使用這個MockDB為App提供數據,這樣當請求使用后端數據的時候,只要后端的RESTful Service 也返回同樣規格的數據就可以了。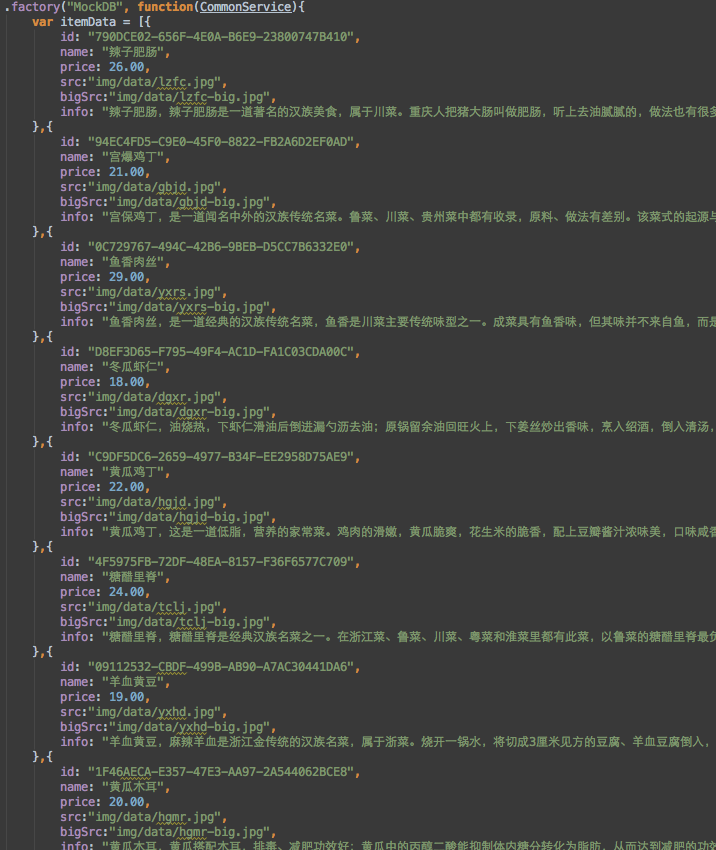
這里代碼比較多,具體代碼在 services.js 中。
接下來處理 派送列表 的 controller 把頁面動作交互和數據連上: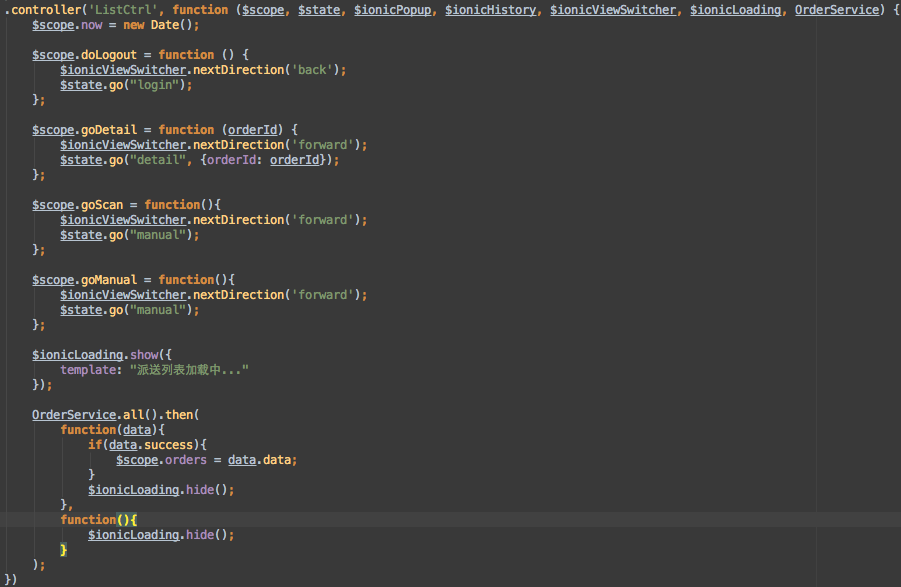
到這里派送列表頁,就處理完了: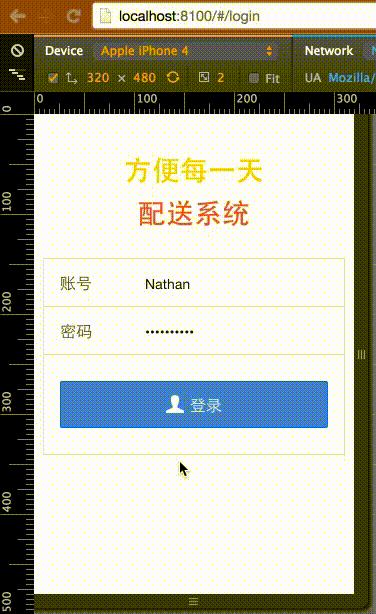
詳細頁面
添加 詳細頁面 html 代碼:
<ion-view view-title="{{now | date:yyyy年M月d日}}">
    <ion-nav-bar class="bar bar-balanced" align-title="center">
        <ion-nav-buttons side="left">
            <li class="button icon icon-left ion-chevron-left" ng-click="doLogout()">退出</li>
        </ion-nav-buttons>
    </ion-nav-bar>
    <ion-content class="list order-list">
        <ion-item  class="item order-item" ng-repeat="order in orders" ng-click="goDetail(order.id)">
            <img class="order-img" ng-src="{{order.qrSrc}}" ng-click="goDetail(order.id)" />
            <div class="order-text">
                <h2 ng-click="goDetail(order.id)">{{order.code}}</h2>
                <h3>{{order.pickTime}}</h3>
            </div>
            <div class="order-check">
                <a class="button icon-right ion-chevron-right button-clear button-assertive"></a>
            </div>
        </ion-item >
    </ion-content>
    <div class="bar bar-footer bar-positive">
        <div class="button-bar">
            <li class="button icon ion-ios-keypad icon-text" ng-click="goManual()">手動輸入</li>
            <li class="button icon ion-qr-scanner icon-text" ng-click="goScan()">掃描二維碼</li>
        </div>
    </div>
</ion-view>
添加頁面 controller :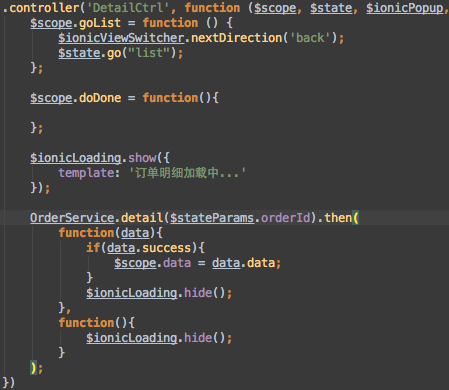
到這一步 詳細頁面完成了: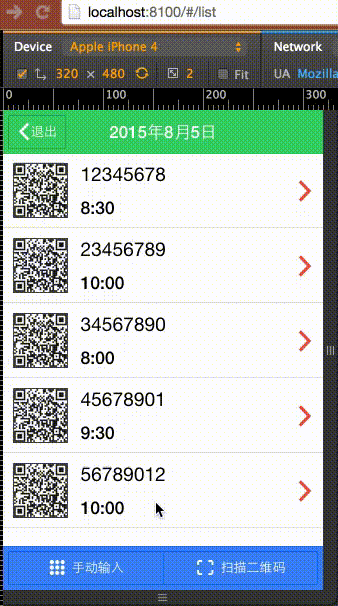
接下來就是手動輸入頁面,和掃描頁面,這兩個頁面比較簡單,類似于前面的頁面,寫好頁面Html,配置好 controller 的內容,就可以了。
到這里所有頁面的 UI 都完成了。 你可以到 https://github.com/zhangsichu/DeliveryApp/releases/tag/AllPageUI 下載這個階段的代碼。
也可以使用 git checkout AllPageUI 取得
| git checkout AllPageUI |
原文鏈接:http://zhangsichu.com/blogview.asp?Content_Id=158
文章列表


 留言列表
留言列表
