在上個例子中我們演示了如何使用Spring JMS來向ActiveMQ發送消息和接收消息。但是這個例子需要先從控制臺使用ActiveMQ提供的命令行功能啟動一個Message Broker,然后才能運行示例。這個Message Broker就相當于一個server,無論是發送方還是接收方都可以連接到這個Server進行消息的處理。在某些情況下,讓Message Broker和consumer啟動在同一個JVM里面,通信效率肯定會高不少。
ActiveMQ提供了很多方式來創建內置的broker。這篇文章主要介紹使用Spring及XBean來創建一個內置的broker。
首先需要在項目中引入xbean-spring依賴項。
pom.xml
1
2
3
4
5
<dependency>
<groupId> org.apache.xbean</groupId>
<artifactId> xbean-spring</artifactId>
<version> 3.16</version>
</dependency>
然后在Spring配置文件中加入以下代碼:
1
2
3
4
5
<amq:broker id= "activeMQBroker" >
<amq:transportConnectors>
<amq:transportConnector uri= "{jms.broker.url}" />
</amq:transportConnectors>
</amq:broker>
注意在Spring配置文件中還要加入Namespace的定義。
1
2
3
4
5
6
7
8
9
10
11
<beans xmlns= "http://www.springframework.org/schema/beans"
xmlns:xsi= "http://www.w3.org/2001/XMLSchema-instance"
xmlns:amq= "http://activemq.apache.org/schema/core"
xsi:schemaLocation= "http://www.springframework.org/schema/beans http://www.springframework.org/schema/beans/spring-beans.xsd
http://activemq.apache.org/schema/core http://activemq.apache.org/schema/core/activemq-core-5.8.0.xsd" >
...
...
...
</beans>
完整的Spring配置如下。
embedBroker.xml
1
2
3
4
5
6
7
8
9
10
11
12
13
14
15
16
17
18
19
20
21
22
23
24
25
26
27
28
29
30
31
32
33
34
35
36
37
38
39
40
41
42
43
44
45
46
47
48
49
50
51
52
53
54
55
56
57
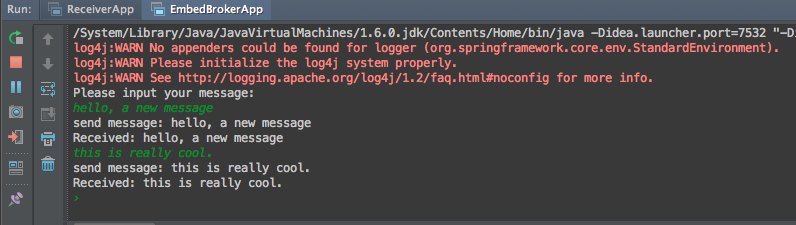
<?xml version="1.0" encoding="UTF-8"?>
<beans xmlns= "http://www.springframework.org/schema/beans"
xmlns:xsi= "http://www.w3.org/2001/XMLSchema-instance"
xmlns:amq= "http://activemq.apache.org/schema/core"
xsi:schemaLocation= "http://www.springframework.org/schema/beans http://www.springframework.org/schema/beans/spring-beans.xsd
http://activemq.apache.org/schema/core http://activemq.apache.org/schema/core/activemq-core-5.8.0.xsd" >
<bean class= "org.springframework.beans.factory.config.PropertyPlaceholderConfigurer" >
<property name= "location" >
<value> application.properties</value>
</property>
</bean>
<!-- Activemq connection factory -->
<bean id= "amqConnectionFactory" class= "org.apache.activemq.ActiveMQConnectionFactory" >
<!--<property name="brokerURL" value="{jms.broker.url}"/>-->
<constructor-arg index= "0" value= "{jms.broker.url}" />
<property name= "useAsyncSend" value= "true" />
</bean>
<amq:broker id= "activeMQBroker" >
<amq:transportConnectors>
<amq:transportConnector uri= "{jms.broker.url}" />
</amq:transportConnectors>
</amq:broker>
<!-- ConnectionFactory Definition -->
<bean id= "connectionFactory" class= "org.springframework.jms.connection.CachingConnectionFactory" >
<constructor-arg ref= "amqConnectionFactory" />
</bean>
<!-- Default Destination Queue Definition-->
<bean id= "defaultDestination" class= "org.apache.activemq.command.ActiveMQQueue" >
<constructor-arg index= "0" value= "{jms.queue.name}" />
</bean>
<!-- JmsTemplate Definition -->
<bean id= "jmsTemplate" class= "org.springframework.jms.core.JmsTemplate" >
<property name= "connectionFactory" ref= "connectionFactory" />
<property name= "defaultDestination" ref= "defaultDestination" />
</bean>
<!-- Message Sender Definition -->
<bean id= "messageSender" class= "huangbowen.net.jms.MessageSender" >
<constructor-arg index= "0" ref= "jmsTemplate" />
</bean>
<!-- Message Receiver Definition -->
<bean id= "messageReceiver" class= "huangbowen.net.jms.MessageReceiver" >
</bean>
<bean class= "org.springframework.jms.listener.SimpleMessageListenerContainer" >
<property name= "connectionFactory" ref= "connectionFactory" />
<property name= "destinationName" value= "{jms.queue.name}" />
<property name= "messageListener" ref= "messageReceiver" />
</bean>
</beans>
在示例項目 中我新加了一個Main方法來進行測試。可以運行EmbedBrokerApp中的Main方法來進行測試。
如果客戶端和broker在相同的JVM進程中,客戶端連接時可以使用broker url為“vm://localhost:61616”,進程外連接則需要使用”tcp://localhost:61616”。如果有多個broker的話可以給每個broker起個名字。
1
2
3
4
5
6
7
8
9
10
11
<amq:broker brokerName= "broker1" >
<amq:transportConnectors>
<amq:transportConnector uri= "tcp://localhost:61616" />
</amq:transportConnectors>
</amq:broker>
<amq:broker brokerName= "broker2" >
<amq:transportConnectors>
<amq:transportConnector uri= "tcp://localhost:61617" />
</amq:transportConnectors>
</amq:broker>
客戶端連接時候可以直接使用broker名稱連接,比如使用”vm://broker1”來使用第一個broker。
本章中的完整源碼可從完整代碼可從https://github.com/huangbowen521/SpringJMSSample 下載。